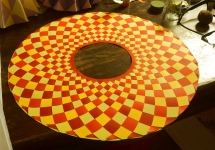
The Lamp Shade with Squares both looks and feels far greater value than the 14 pieces of simple copy paper and the short piece of string required for making it. However, do take care and only use the lampshade for a modern low energy LED light bulb – and still make sure to provide good ventilation.
The size of the lampshade shown is 16 cm between upper and lower edge. This is the maximum size if you want to fit 6 arms onto 1 sheet of A4 paper. You may rescale the templates to get another size as you prefer.
For a 16 cm lampshade in two colours, A and B, you need:
- 7 sheets of A4 paper in colour A and 7 sheets in colour B
- A piece of string or pretty ribbon, if you what to adorn your lampshade with a bow
- A lamp with a steel frame to carry the lampshade
- Steel ruler and needle for scoring and pulling the string/ribbon through the small holes
- Glue
The lampshade is made from the same kind of template as the simple cone, and the weaving process is similar.
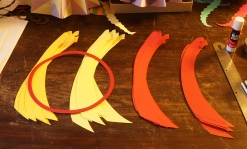
- Cut out 1 set of 36 arms (6 sheets) in colour A and another 36 arms in colour B. All arms are the same, however, the two sets should be mirrored, if you use paper with a different front and back
- Cut out the upper ring strip in colour A
- Cut out the 5 sections of the lower ring strip in colour B
- Fix the first set of 36 arms in colour A to the upper ring strip, the base’s arch aligned with the inner arch of the ring strip. All arms swirling in the same direction. There is room enough for all, but if it turns out that the ring strip is either too large or too small just cut the ring and add or remove what is required. Since the ring strip will form the upper edge on your lampshade make sure that the adjustment does not show on front
- Fix the second set of arms in colour B in the same way, bases aligned with those of the arms in colour A, arms now swirling in the opposite direction
- Weave all arms while the project is still flat on the table
- Line up and fix with a little glue along the outer edge
- Turn the project so that the upper ring strip is showing. Smear glue on one of the large arched strips and fix it aligned with and outside the outermost point of the last full woven square showing
- Add more strips until the lower ring is complete
- Cut away any surplus material outside the lower ring
- Score the project from the centre and out. The score lines should run along the diagonals of the set of squares having no small hole
- Crease along every second scored line outwards and the rest inwards.
- Use a needle to pull the string through the small holes
- Tighten and tie a not on the rear side or a bow in front. The diameter of the hole in top should be about 2 cm when the project lies flat on the table
The pictures below illustrate the main steps of the process. We have used two shades of red and two shades of yellow to obtain a vivid appearence.
When you turn the light on, you will observe that the woven pattern nearly disappears and your Lamp Shade with Squares becomes quite different – now mainly featuring the shape of the arms. This is because the light has to pass both layers of paper and thus the sequence is of no importance. To maintain some of the woven look the lamp with your lampshade should not be the only source of light within the room.
And vector-pdf files for cutting: lamp shade 1 cut ; lamp shade 2 cut ; lamp shade 3 cut


Fantastic. http://www.favoricanta.com
Pingback: Gewobener Papier-Lampenschirm » unikatissimas